|
2003 TOYOTA COROLLA TRANSMISSION BEARING FIX
Counterweight Bearing Replacement
|
So imagine my surprise in 2017 when a clattery sound appeared when accelerating/decelerating in 2nd-5th gear. It wasn’t the throwout bearing, it wasn’t a heat shield vibrating, it wasn't a timing chain, it was coming from the left part of the transaxle and was getting worse. An online search showed that other 2003 owners have complained about the same problem said to be caused by a failed countershaft bearing in the transaxle. Repair details were hard to come by because people chose to swap out the transmission rather than having it repaired. This reveals an odd twist of the repair industry: automatic transmission repair shops are commonplace with franchises nationwide. Yet its very difficult to find a shop that will remove and repair a manual transmission. In other words the industry "model" of rebuilding and replacing automatic transmissions is well-developed while manual transmission repair is fringe.
The result is that the common manual transmission fix is to have a used one swapped in. This is a poor choice and a big $$$ gamble. Spending a fortune on a used transmission that may have been abused and/or has very high mileage only to have it fail again in a few months doesn't seem appealing. Don’t forget that the labor to R&R a manual transmission in a Corolla is upwards of 10 hours. Rather than spend twice what the car is worth to install a different transaxle many people get rid of the car at this point.
However, its possible to replace the failed bearings with the transmission in the car and save a large chunk of cash. There are only a few steps but care must be taken and couple of different pullers are needed. I could have done it in one day but because I ran into a difficult step it added some time. I posted a lot of photos below of the process.
MY BAD BEARING
HERE is a video of the failed bearing in my transaxle. I believe the failure was caused by several factors:
- Toyota specifies a 30,000 mile replacement for 5-speed gear oil.
- The Haynes manual doesn't show the location of the gear-oil filler nuts making changing oil difficult.
- Replacing a CV joint lets gear-oil drip out of the side of the case during the process. If you ever had one replaced did the repair shop add gear oil back when they did yours? Are you sure?
- The front of the countershaft bearing that fails is open but the rear is sealed. It also sits at the bottom of the case where it can steep in contaminants.
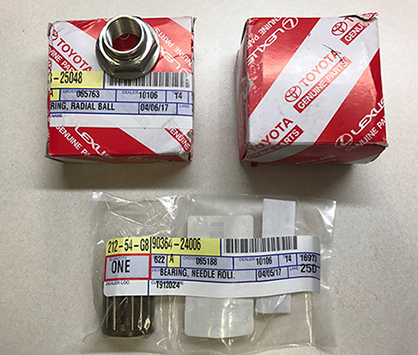
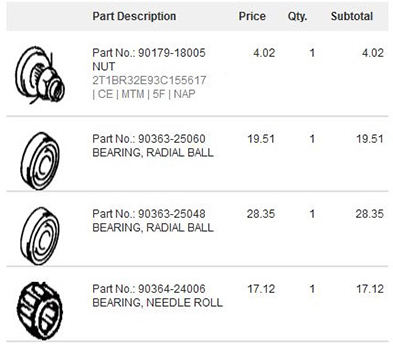
Despite all my car-care I was partially at fault. My car was running so well and I put so few miles on it yearly that that replacing the gear oil slipped off my radar. When the bearing got noisy I finally changed the oil and found only about one pint of dirty oil in the transaxle (ouch). My theory is the need for 30,000 mile gear oil changes, coupled with low levels of dirty oil, and an unsealed bearing contributed to its failure. Below are the new Toyota parts I bought.
 |
 |
MY REPAIR
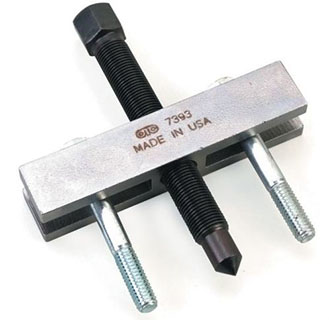
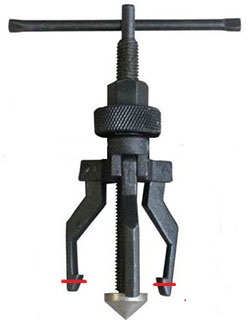
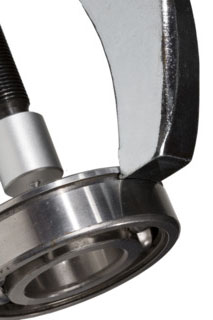
To remove the large 5th gear hub the puller-style on the left is needed. To remove the gear under the 26mm locknut I had to modify a small gear puller by grinding off the bottom of each jaw. To remove the bearings from the case I used a Posi-Lock TJ-2 which is designed to grab the outer grooves.
 |
 |
 |
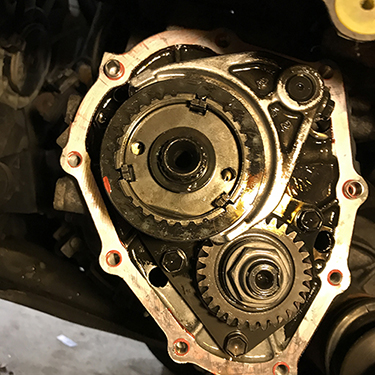
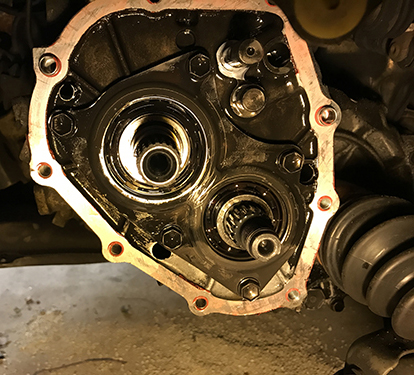
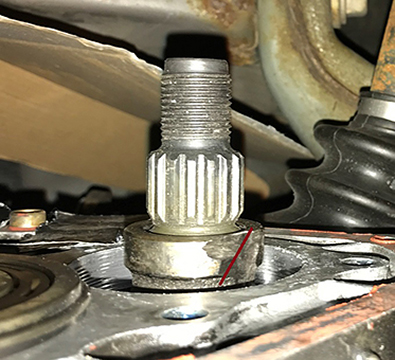
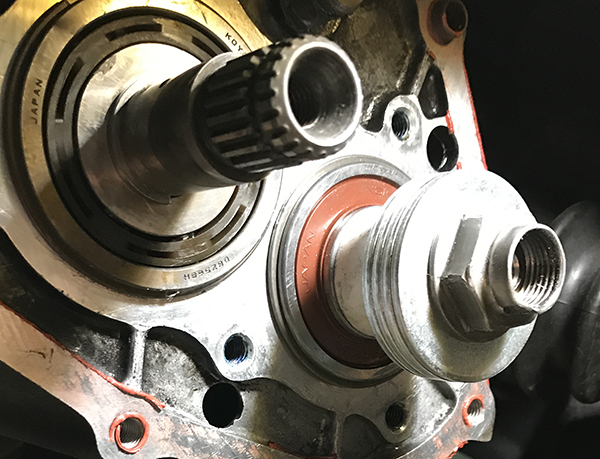
The side transaxle cover is visible inside the left hand wheel well. I was happy to find that there is enough clearance to pull the cover by unbolting and tapping it off. NO cutting was needed. The red line is where I had thought I might have to cut.
 |
Next I removed the snap ring from the end of the (larger) 5th gear. Remove the circlip from the three shifter keys then remove the nut holding the shifter fork and slip it off.
 |
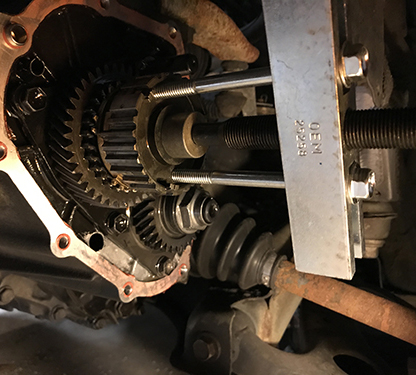 |
ABOVE: To remove the gear I used a puller in the 8mm holes in its hub. I used a propane torch to heat up the gear for a minute or two, nothing extreme. I was then able to pull 5th gear off with no issues.
 |
 |
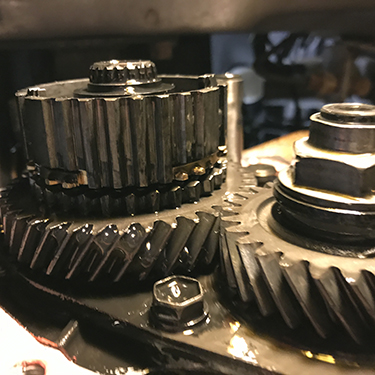
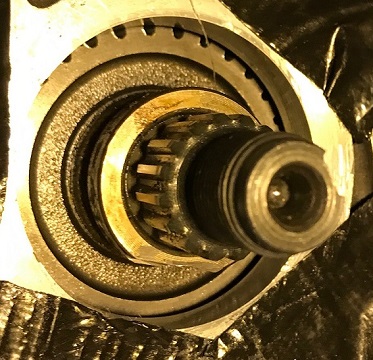
ABOVE: Side view of the gear and synchronizer for reference. I put a scotchbrite pad between the gear teeth to hold it and used an impact wrench to remove the 26mm nut on the smaller shaft after unpeening its flange.
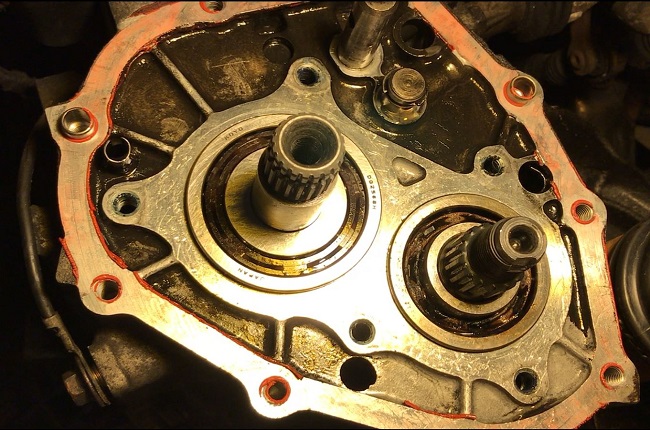
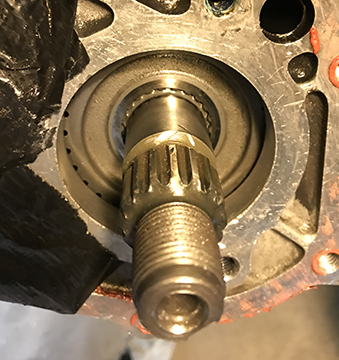
To the right is a view with all the gears removed. A small circlip holds down the inner race on the left bearing while a thin circlip sits around the OD in a groove.
Significant is that both outer races are a loose fit in the case and can be rotated by hand. The interference fit is only on
the center shafts.
 |
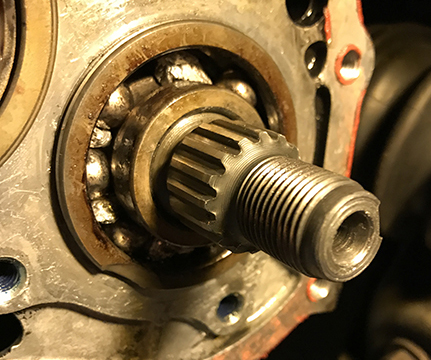
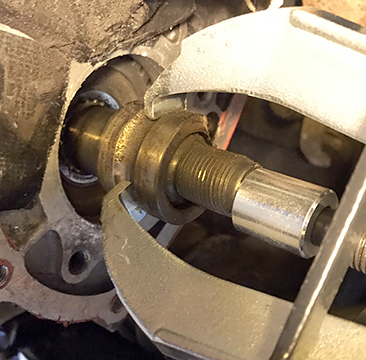
To get the larger bearing out of the case I heated its race with a propane torch and sprayed freeze-it spray down the bore of the the main shaft for 30 seconds to shrink it. This let me pull off the bearing using an "transmission bearing groove" puller (Posi Lock TJ-2) that grabs the outer groove in about 3 minutes. The smaller bearing was different though. Even using a propane torch for 5 minutes on the inner race didn't allow me to budge the bearing a millimeter and it broke the teeth off two bearing pullers. It was STUCK.
I tried rolling the balls to one side to snap the center race away. My shaft was fixed in place so I couldn't use this method.
I used an old-school method and dremeled away a spot on the inner/outer race large enough to remove the balls. Once I pried the last ball out the outer race slipped out by hand. Now I had to figure out how to get the INNER race off.
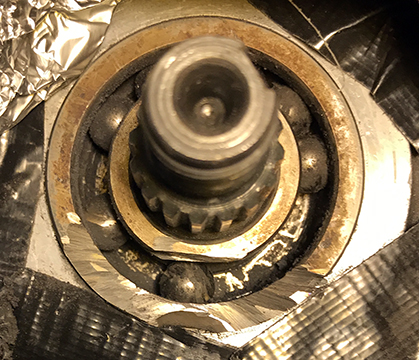
BELOW: I had tried using pieces of aluminum foil to hold the ball-bearings to distribute their load. This didn't help and the groove-puller actually broke the edge off the outer race. BELOW
RIGHT: See the marks from the angle grinder? A dremel helped remove the last tiny edge to free the balls. The black crud is carbonized oil from the propane torch and dust from grinding.
 |
 |
BELOW: The inner race was still stuck tight so this left one last method: CUTTING.
After masking off the case to protect it I was able to get a Dremel with a 420 cutting wheel in at 45 degrees and cut a groove about 3/4 the way through the top edge of the race.
 |
 |
I then took a small cold chisel and whacked the groove a couple of times hard. The inner race cracked open like magic and pulled off easily.
 |
 |
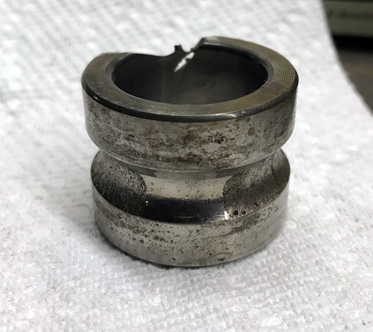
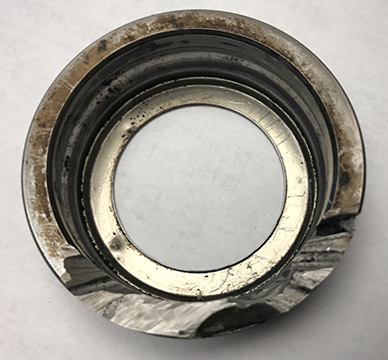
BELOW: this is the difficult to remove inner race. I believe it was seized because of the pounding it received while failing. The groove is heavily spalled with what looks like lubrication damage. Notice the staining and oxidation evidence of dirty oil. The notch on the far side is from my dremel grinding.
 |
THE OLD/NEW BEARINGS
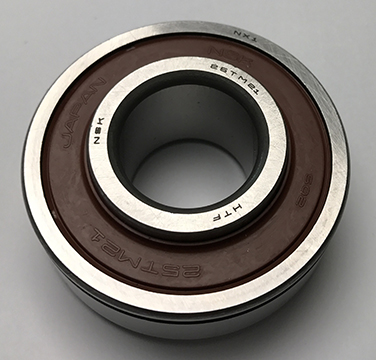
LEFT: the stock bearing was a Nachi 25B1W06S3Z. This is a "single shielded, deep groove ball bearing" with open front and shielded back. Per Timken: "a shield on one side provides protection against the entrance of coarse debris and makes it possible to re-lubricate the bearing from the open side". The replacement supplied to me by Toyota is a SKF 25TM21 which is sealed on both sides. Sealed bearings are internally greased and the seals provide protection from contaminants. Toyota apparently saw a need to change to this newer style bearing. The larger bearing was a Koyo which appeared ok but I replaced it anyway.
 |
 |
PUTTING IT BACK TOGETHER
The prepare the shafts for reinstalling the bearings I used 1000 grit sandpaper and oil on the journals to polish them, along with the leading edge to take off any burrs.
Heating bearings to make them easier to go on the shaft is a common practice but I didn't want to damage the plastic cages. So I used an old-school trick of placing the bearings directly on top of a 100-watt incandescent light bulb to heat only the inner race. I left it on for about 30 minutes.
To press in the new bearings I made a tool by cutting down a 3/4" PVC pipe into different widths, a 10mm bolt and several washers on top. I've used this trick before and it lets you precisely tighten and press on bearings without cocking them in the bore. I spent a full minute spraying the inside of the hollow shaft with freeze-it spray. Moving quickly I was able to slowly tighten it into place with the PVC tool.
On the smaller bearing I used the same trick and doused the shaft with freeze-it before pressing on the lightbulb-heated bearing. To prevent the shaft from turning I put the car in gear and held a crowbar across the wheel lug bolts with my foot. Using this method I was able to press the both bearings in with no fuss.
 |
GEAR OIL
Toyota specifies a 75-90W GL-4 gear oil for the Corolla 5-speed. GL-5 grade can damage brass parts, is unsuitable and is meant for differentials.
The problem is that GL-4 gear oil is difficult to find nowdays as the major companies appear to have phased it out. I decided to use the well-regarded Red Line MT-90 GL4 gear oil.
CONCLUSION
After putting the side cover back on and refilling the oil I went for a highly-anticipated test drive. The countershaft bearing had obviously been the culprit as my car is now quiet(!) Driving is solid and precise, with a tight, predictable feel to the transmission. Shifting is ultra-smooth and effortless. Before, along with the rattling from the bad bearing I used to get a mild grinding into 3rd gear and the action was a bit notchy. I think the Red Line oil smoothed out the syncros and shift action. I spent about $300 on parts, pullers, and supplies which made this a major success compared to swapping in a used transmission or buying a new car. Had this repair gone smoothly it would have taken me a just a weekend. But because the smaller bearing wouldn't budge I had to spend a lot of time brainstorming. My new mantra is to cut a bearing race if needed.
NOTE: It occured to me that Toyota dealerships could offer this repair in lieu of transmission replacement. I think the reason they don't is modern day shop-manuals cover replacement estimates by the hour, not repair of broken parts. Due to the unpredictable nature of some steps of this fix I can see why this isn't offered.
Datsunzgarage.us © 1997-2026
All mods are illustrative only, perform at your own risk.
Datsun is a registered trademark of Nissan®